


How to Replace the Brake Lever
The brake levers on the ebike are a components for your safety. It is important that check the brakes perform well before each ride.
ATTENTION: If you cannot install the part correctly, and follow these steps safely, we suggest you find a certified bike mechanic for assembly, maintenance and repair.
Tools and parts: the new right and left brakes with waterproof cable, 3mm Allen wrench, 5mm Allen wrench, a cup of hot water, wooden hammer, gloves
Step:
Left brake with bell:
1. Romove the left handlebar grip and turn signal and put them aside. (handlebar grip installation guide; turn signal installation guide)
2. Remove the old left brake lever
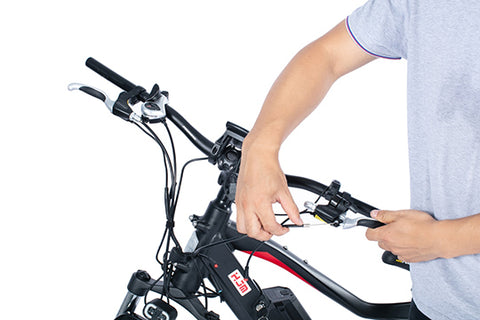
a. The left brake lever connects to the frontcaliper, use a 5mm Allen wrench to loosen the cable pinch bolt about one turn, but be careful not to remove it.

b. Unplug the brake connector, you can see that two sides are red, loosen the brake with 5mm Allen wrench, remove the brake and put it aside.

c. Rotate the adjuster and lock nut at the brake lever, and align the slot of the adjuster and the slot of the lock nut, pull the brake cable out of the brake lever, press the brake lever and lift the cable block up and take it out of the brake lever.

d. Loosen the left brake with 5mm Allen wrench, remove the brake and put it aside.

3. Install the new leftr brake lever
a. Install the new leftbrake, adjust the brake angle to be same as the right brake lever, then tighten the brake bolt with 5mm Allen wrench.

b. Align the adjuster slot, lock nut slot and lever housing slot, press the brake lever to reveal the mounting point for the cable block, put the cable block into the mounting point and pass the cable through the lever housing slot, lock nut slot and adjuster slot.

c. Locate the two sides of the red brakes connector, carefully align the inernal pins and notches and external arrows, press directly together without twisting.

d. Rotate the adjuster and lock nut, do not let their solts align, tighten the adjuster and lock nut clockwise by hand.
e.Push the brake caliper arm up to the brake cable while pulling the brake cable downward so it is taut and tighten the cable pinch bolt with 5mm Allen wrench.

4. Reinstall the turn signaland left handlebar grip. (handlebar grip installation guide; turn signal installation guide)
Inspection:
1. Press the brake lever to check the position of the brake lever, the middle of the brake lever and handlebar is the best position.
2. If the brake lever is too close to the handlebar, rotate thefront brake caliper adjuster to tighten the brake cable.
3. If the brake lever is too far to the handlebar, rotate the adjuster and lock nut at the brake leverto loose the brake cable.
4. Check the function of the brake lever.
5. Check that the turn signal has been installed tightly, and the connector is securely connected.
6. Press the button “i” to turn on the e-bike system, check that the function of the turn signal.
Right brake:
1. Romove the right handlebar grip and throttle and put them aside. (handlebar grip installation guide; throttle installation guide)
2. Remove the old right brake lever
a. The right brake lever connects to the rear caliper, use a 5mm Allen wrench to loosen the cable pinch bolt about one turn, but be careful not to remove it.

b. Unplug the brake connector, you can see that two sides are red.

c. Rotate the adjuster and lock nut at the brake lever, and align the slot of the adjuster and the slot of the lock nut, pull the brake cable out of the brake lever, press the brake lever and lift the cable block up and take it out of the brake lever.

d. Loosen the brake with 5mm Allen wrench, remove the brake and put it aside.


3. Install the new right brake lever
a. Install the new right brake, adjust the brake angle to be same as the left brake lever, then tighten the brake bolt with 5mm Allen wrench.


b. Align the adjuster slot, lock nut slot and lever housing slot, press the brake lever to reveal the mounting point for the cable block, put the cable block into the mounting point and pass the cable through the lever housing slot, lock nut slot and adjuster slot.

c. Locate the two sides of the red brakes connector, carefully align the inernal pins and notches and external arrows, press directly together without twisting.

d. Rotate the adjuster and lock nut, do not let their solts align, tighten the adjuster and lock nut clockwise by hand.
e.Push the brake caliper arm up to the brake cable while pulling the brake cable downward so it is taut and tighten the cable pinch bolt with 5mm Allen wrench.

Inspection:
1. Press the brake lever to check the position of the brake lever, the middle of the brake lever and handlebar is the best position.
2. If the brake lever is too close to the handlebar, rotate the rear brake caliper adjuster to tighten the brake cable.
3. If the brake lever is too far to the handlebar, rotate the adjuster and lock nut at the brake leverto loose the brake cable.
4. Check the function of the brake lever.
5. Check that the throttle has been installed tightly, and the connector is securely connected.
6. Press the button “i” to turn on the e-bike system, check that the function of the throttle.


